Several issues arise with black and white printing:
-I use Capture One for my image editing, but prefer Lightroom for printing (version 6 – I avoid subscription software if I can). Lightroom doesn’t support greyscale ink/paper/printer profiles.
-The printer output is often non-linear. If you print out a series of patches in say 5% steps from white to black, that’s what you’d expect to see in the print. Alas that is often not the case at all. The upshot in a print may be blocked shadows or strange mid-tones that are nothing like what appeared on the screen.
-I prefer to use the “monochrome” setting on my ipf 6300 printer rather than using the colour inks. The monochrome setting still uses some colour ink, but not enough to give me unwanted colour casts. However the prints always come out too dark. This is not issue caused by the screen brightness or the profile. The colour gurus out there will have to take my word on that.
All three are solved using Quad Tone Rip and SpyderPRINT or similar colorimeter.
Download QTR here (http://www.quadtonerip.com/html/QTRdownload.html) and install. In the installation folder go to the icc folder and install the gray-lab.icc onto your system.
Use this as your colour space for monochrome printing. This solves the “prints are too dark” issue. It also allows softproofing B&W images in Lightroom.
Open the Eye-One folder (I’ve create a shortcut from a desktop toolbar).
Open the “Step-21-gray.tif” file and print. Better still, use the 21 step target (already in the QTR colour space) from Camertico for download here.
In Lightroom make sure the printer profile is set to “managed by printer”
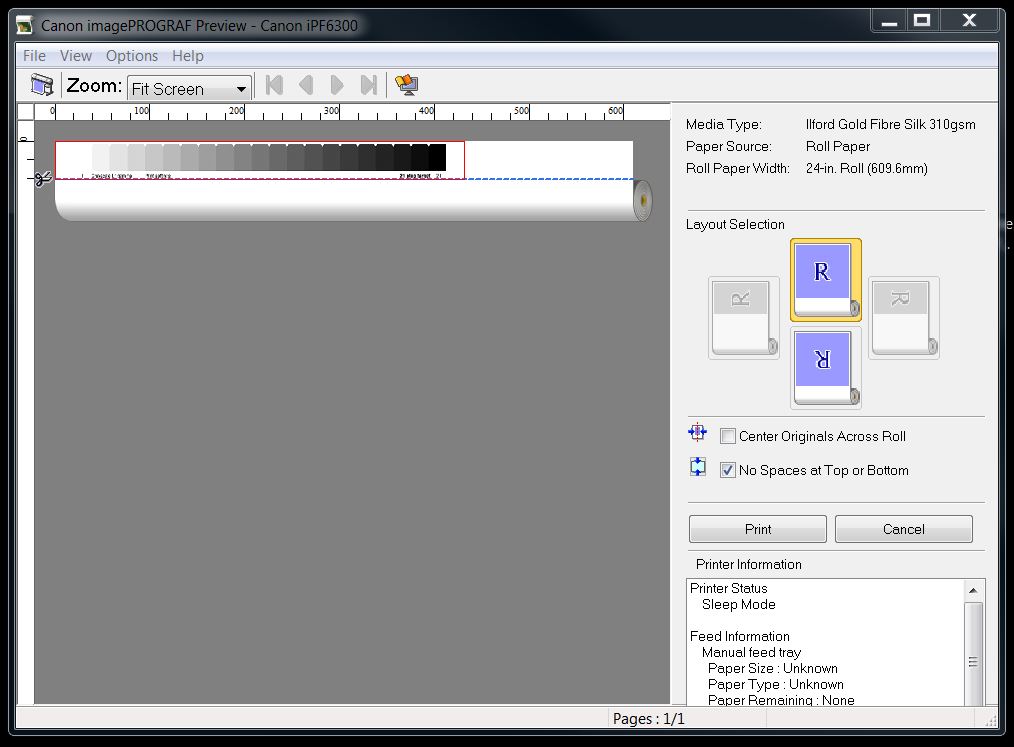
 and in the printer dialogue the colour mode is set to monochrome

In other words, colour management is off.
Tick the “no spaces at top or bottom” in the printer preview panel to avoid a huge waste of paper.
Allow the print to dry for a few hours and measure the patches. In this example I’m using the SpyderPRINT spectrocolorimeter (software version 5.02) because it’s comparatively cheap, it works, and it reads and exports targets directly into QTR format.
Attach the SpyderPRINT device and in the software go to Tools – Calibrate. Place the Spectro on the calibration base, checking that the white tile is clean and is situated below the Spectro-head, and press the Spectro button on the top of the device.
Go to Tools – Measure. Select “Export to..” and enter the title you’ll be using for your icc profile. Tick “QTR Format Override” and “CreateICC”.

Note to self: DO NOT PRESS “DONE”.
Measure each patch starting with the paper white. Then select “Open Export” and locate the measurement text file. Drag and drop it onto the “QTR-Create-ICC-RGB.exe” droplet in the QTR folder.
It will generate two files. An icc file and a text file representing your measurements. It will look something like this:
 You can see there were some issues with a colour cast and a lack of linearity in the blacks for this paper and printer.
Install the .icc profile. Now you can click “Done” and close the program.
If you need to locate the text file again, good luck.
On my system it’s located at: C:\Users\Username\AppData\Local\Datacolor\SpyderPRINT\Data\Export
Here’s a scan of the shadows in the step target before profiling:
 And after profiling:
 It may not show up on your screen, but on the profiled print there is a clear separation in each patch down to black.